Gathering and Importing USGS Terrain Data into STK
- Oct 5, 2020
- Tech Tip
If you use Systems Tool Kit (STK) with online operations enabled, then you can automatically stream United States Geological Survey (USGS) terrain data from AGI's public Terrain Server. This process is as simple as adding a Place object and setting your view in STK’’s 3D Graphics window.
But even if you don't (or can't) take advantage of that streaming terrain service, you can still freely obtain and convert USGS terrain data to use it in STK. In this Tech Tip, I have outlined the steps you’ll need to take to gather and import USGS terrain data.
Obtain terrain data from the USGS website
- In a web browser, go to: https://apps.nationalmap.gov/viewer/
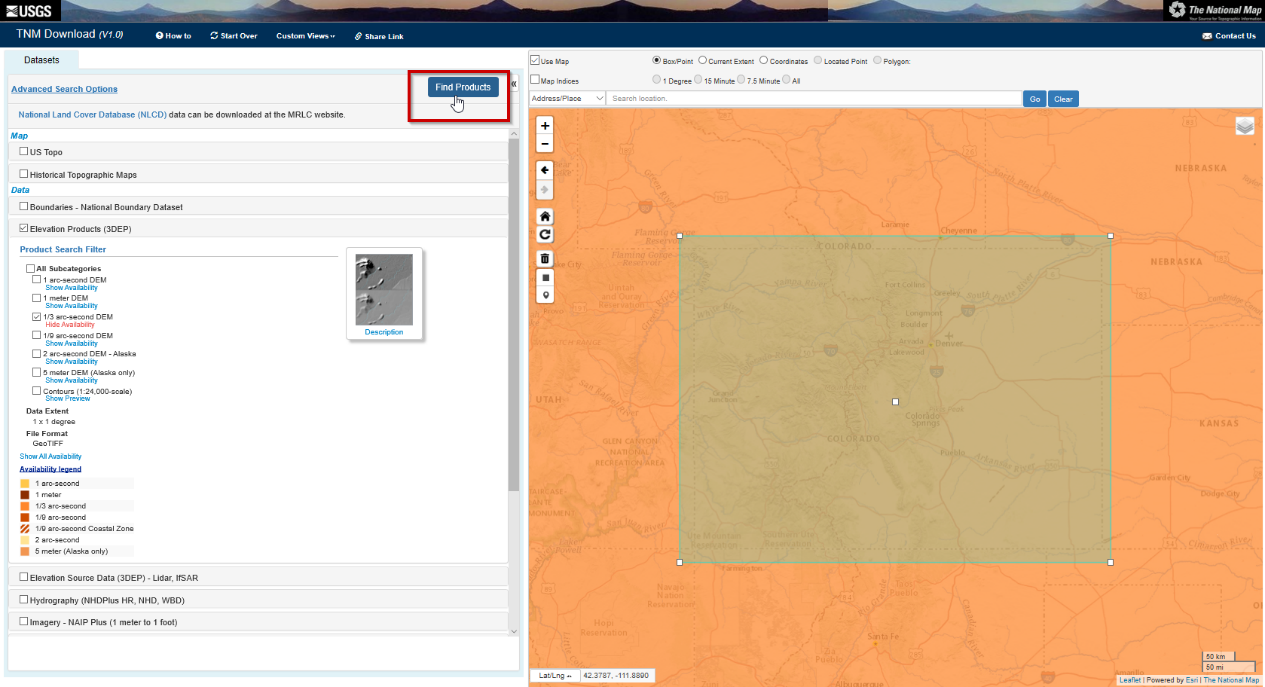
- In the left-hand column under Data:
- Enable Elevation Products (3DEP)
- Under the Product Search Filter, select Terrain Fidelity (e.g., 1/3 arc second DEM)
- Under the Terrain option, select Show Availability (e.g., 1/3 arc second DEM)

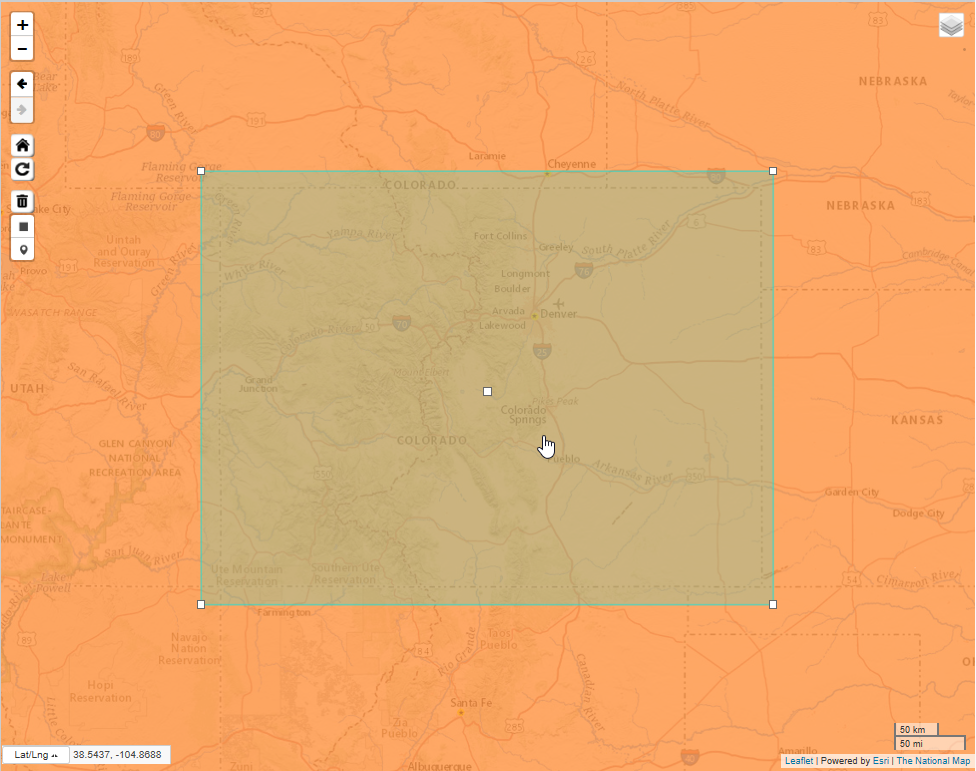
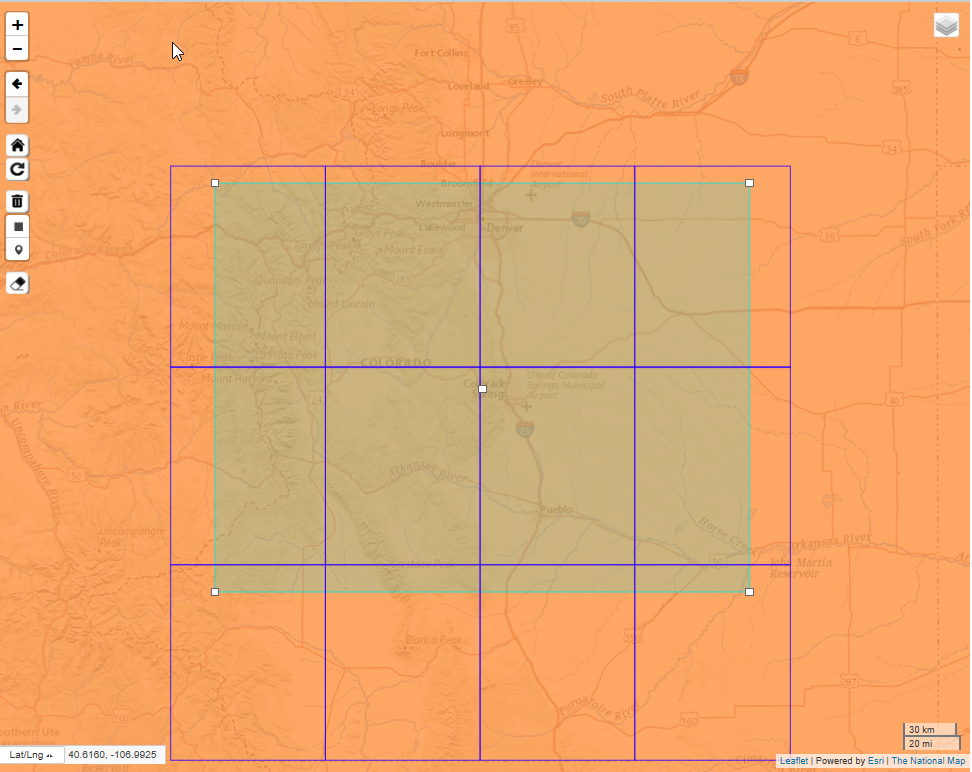
- You will notice the 1/3 arc-second data highlighted on the map, in orange. Within the map, select the Draw Rectangle icon
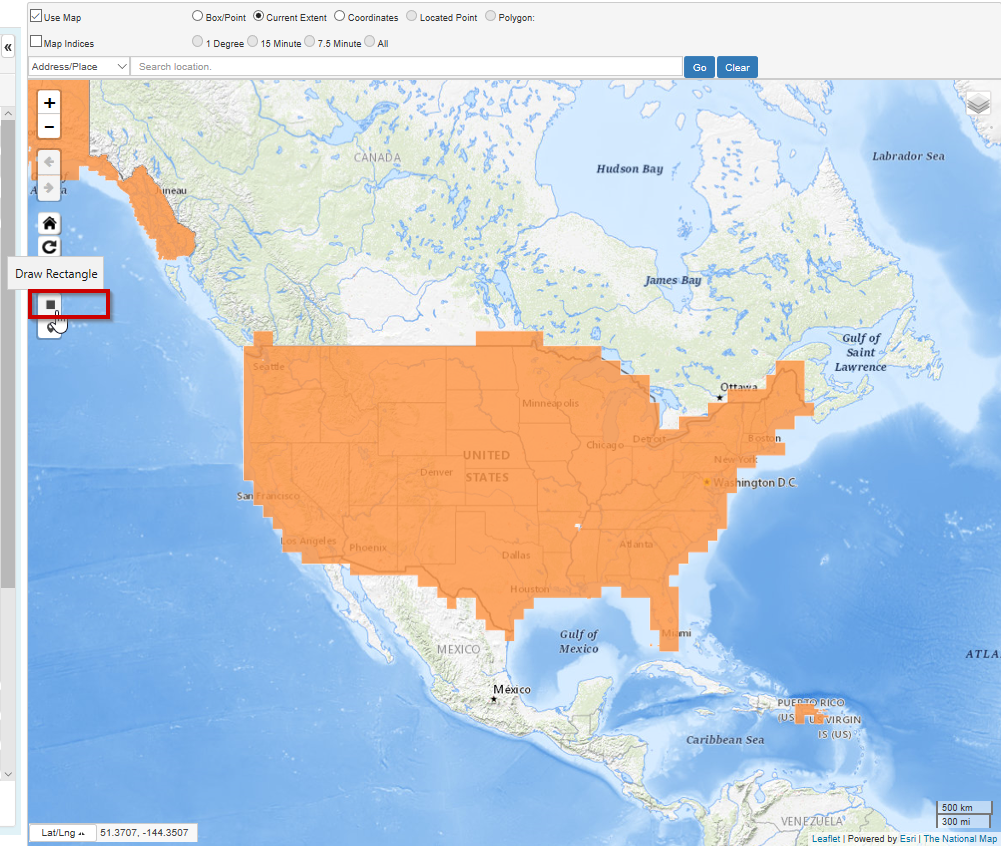
- Within the highlighted space, draw a rectangle over your area of interest (e.g., Colorado)
- In the left-hand column, select Find Products.
- A Products tab will appear. Select Show Footprints to show all available terrain tiles.
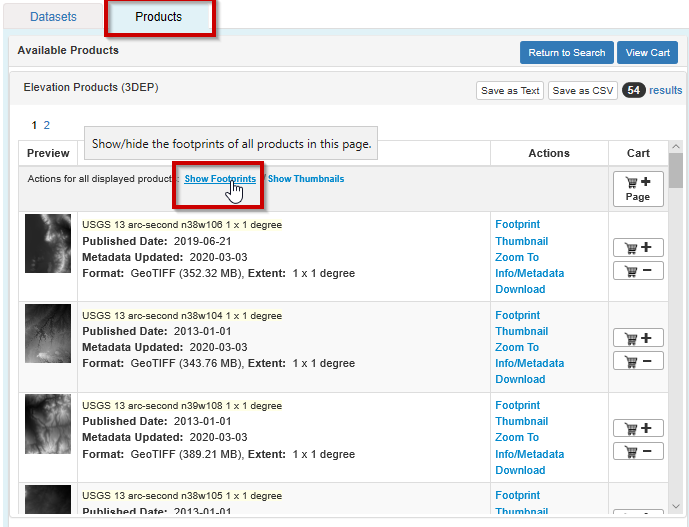
- The map will display an outline for all available data.
- Select a terrain tile of interest. Make sure it is highlighted in both the Products tab on the left and in the map view. Also, verify that your Format is set to GeoTIFF or DEM.
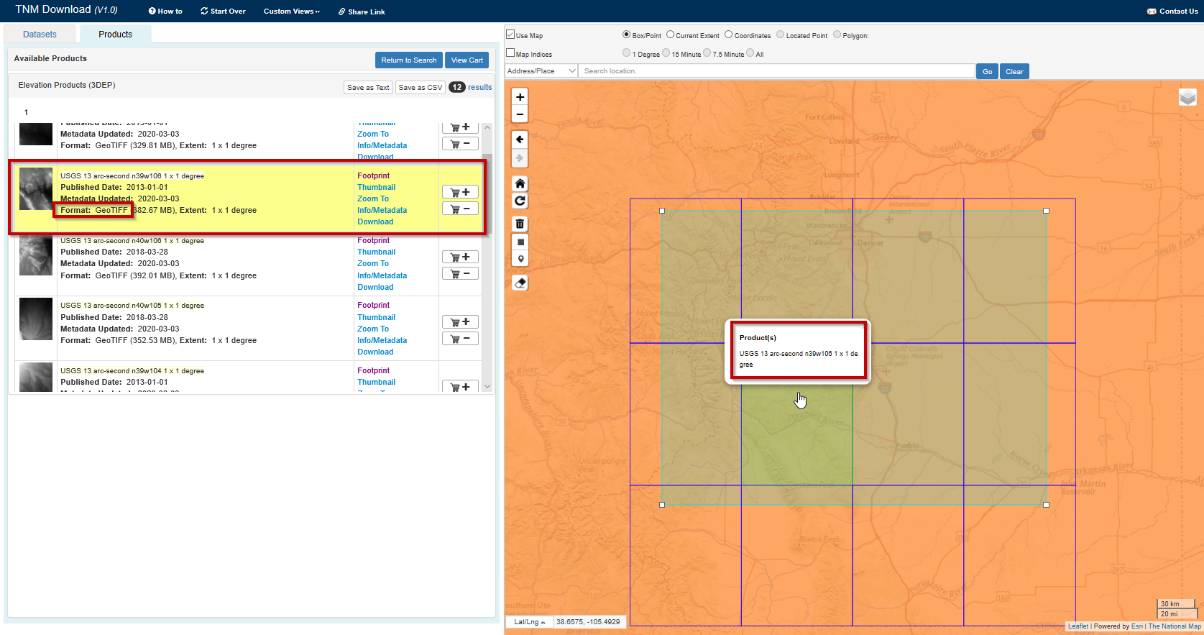
- In the left-hand column, select Download within the terrain tile of interest, and download the file to your computer.

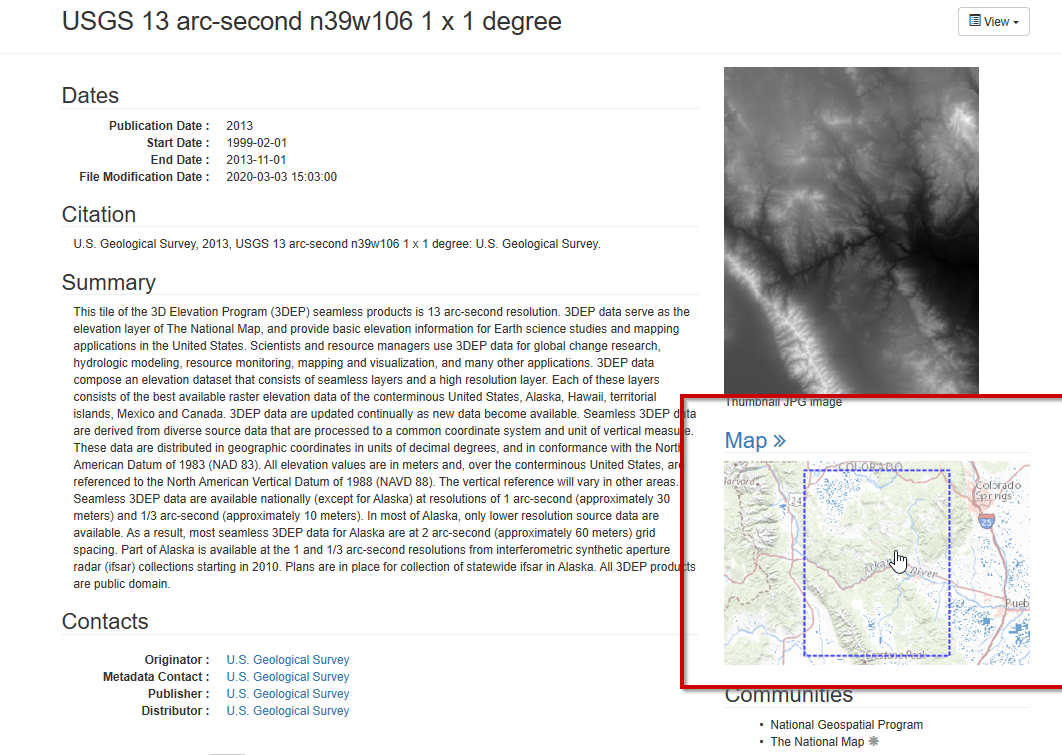
- In the left-hand column, select Info/Metadata within the terrain tile of interest. This should open a new browser tab or window.

- In the new terrain information tab or window, download the image file under Related External Resources.
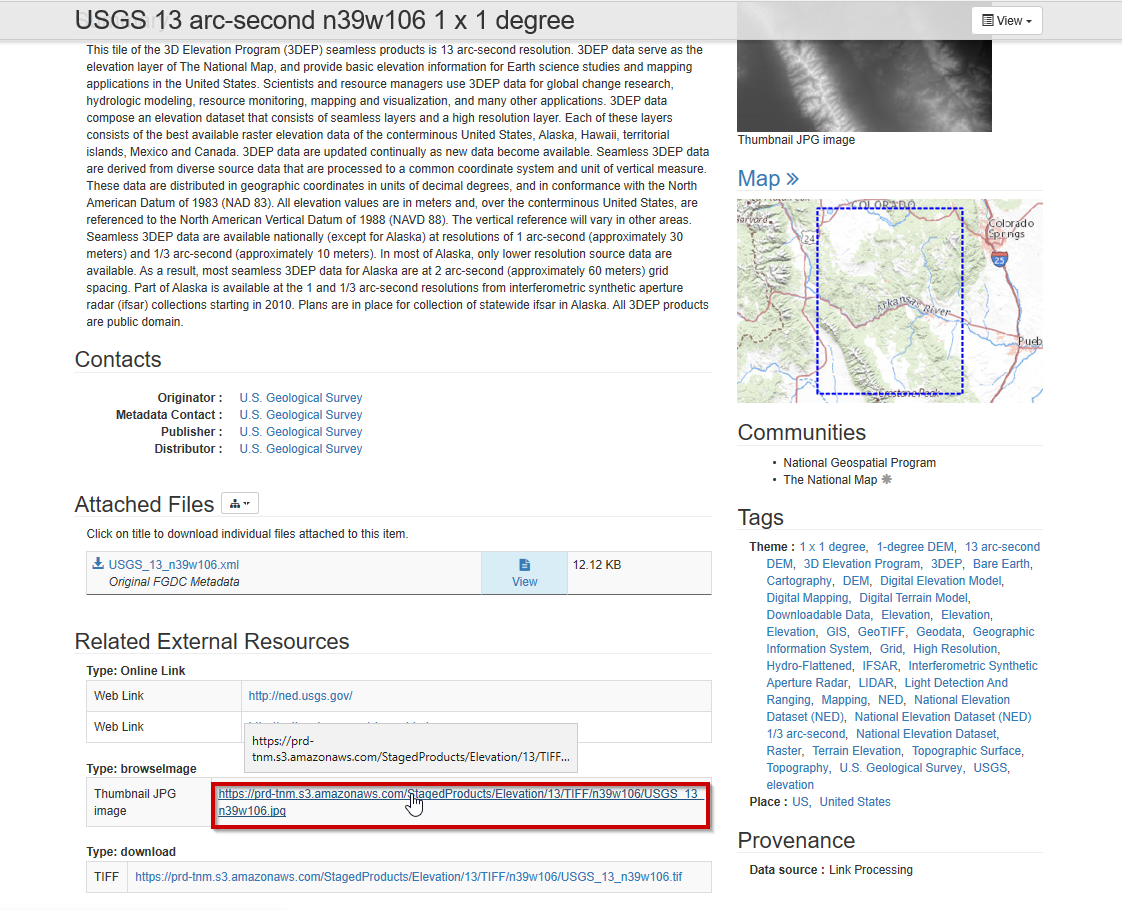
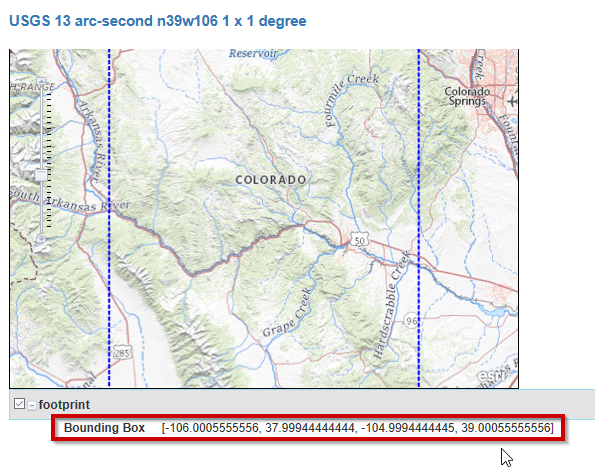
- Click the Map on the terrain information page.
- Make note of the Bounding Box latitude and longitude values. These will be necessary when importing the terrain data into STK.
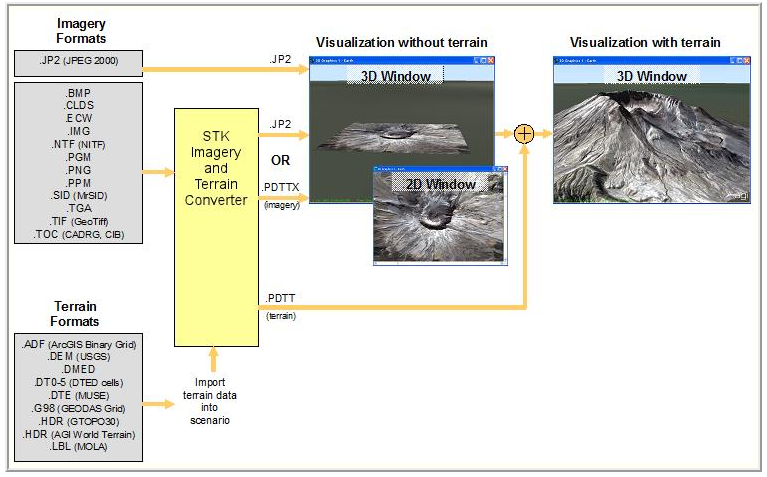
Terrain conversion – TIFF or DEM to PDTT
To add USGS terrain data to an STK scenario, you need to use the STK Imagery and Terrain Converter, a stand-alone application that is installed with STK. You can use the Imagery and Terrain Converter to:- Convert image types to .jp2 or .pdttx to be visualized in STK
- Convert terrain (with optional imagery) types to .pdtt to be used in STK
- Stitch together multiple images
One issue you may encounter when sourcing terrain from the USGS site is a change to the file extension. You may notice that some GeoTIFF data files switch between .tif and .tiff extensions when you download them. Although a Tagged Image File Format is abbreviated as TIFF, you can only import a .tif file into STK. Therefore, you will need to make a quick change to the file extension syntax if you run into this issue. Here’s how:
Changing .tiff to .tif (if applicable)
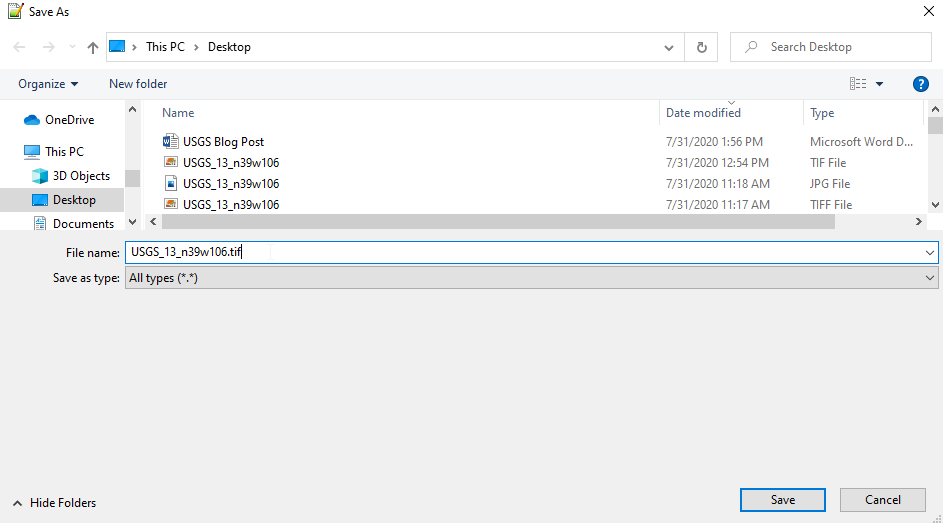
- Open the downloaded TIFF file using a text editor such as NotePad or WordPad.
- Save the file with the .tif extension.
Import terrain into STK
- In your STK scenario, open your Scenario Properties and browse to the Terrain page.
- In the Terrain Server field, make sure that the box next to Use terrain server for analysis is not checked.
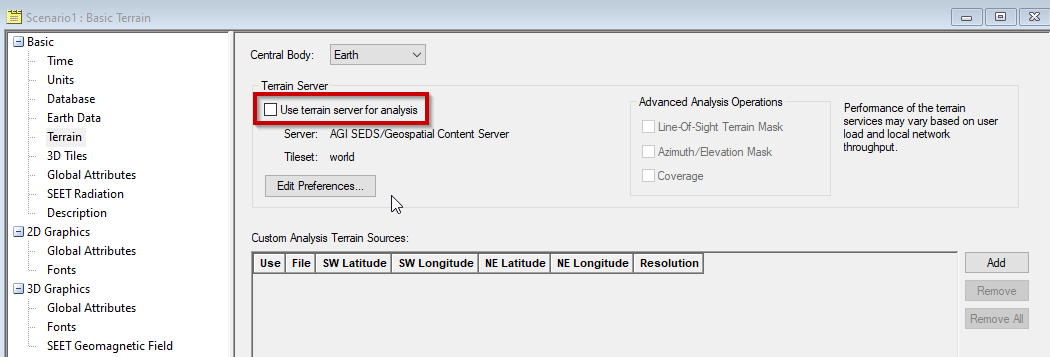
- In the Custom Analysis Terrain Sources field, select Add.
- Change the Files of type to your file type of interest. (e.g., “Tagged image File Format .(tif)”).
- Select the proper terrain file (e.g., USGS_13_n39w106.tif).
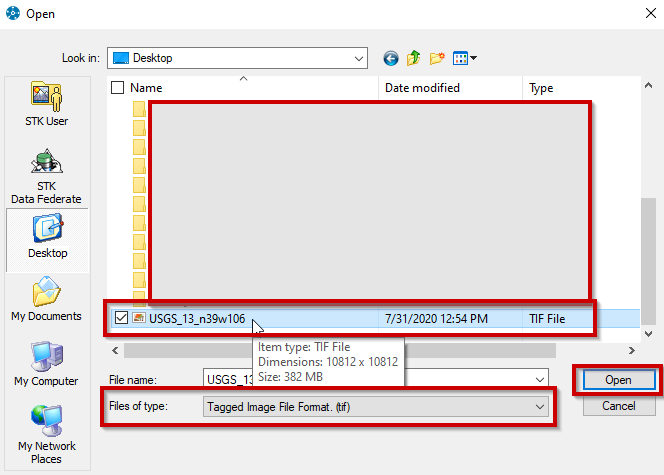
- Select Open.
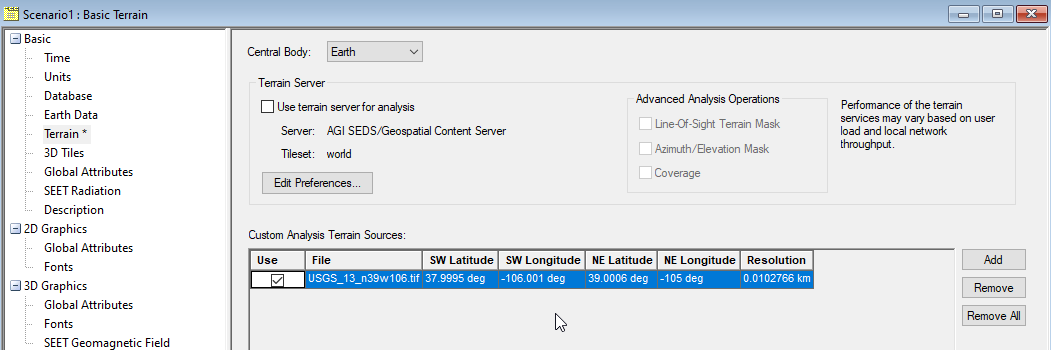
- The terrain file should then be loaded in the Custom Analysis Terrain Sources field.
- Select OK to close Scenario Properties.
- Open Utilities from the top STK toolbar and select Imagery and Terrain Converter.

- In the Imagery and Terrain Converter window, select Terrain Region in the left column.
- Select the drop-down arrow in the Terrain Source field and select the terrain file (e.g., USGS_13_n39w106.tif)
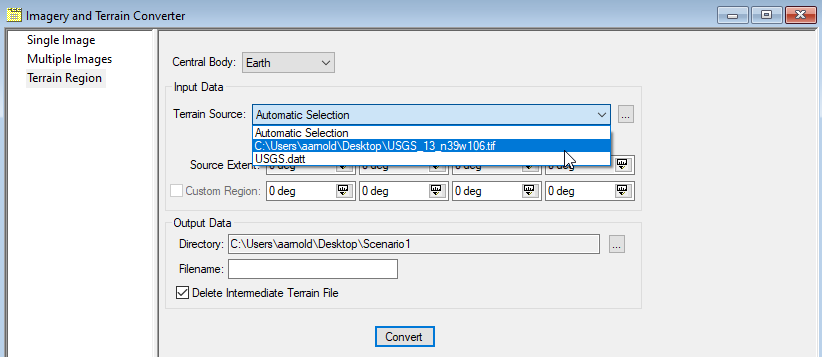
- Verify that the Source Extent field auto-populates. If the Source Extent field is unpopulated, confirm the bounding box values.
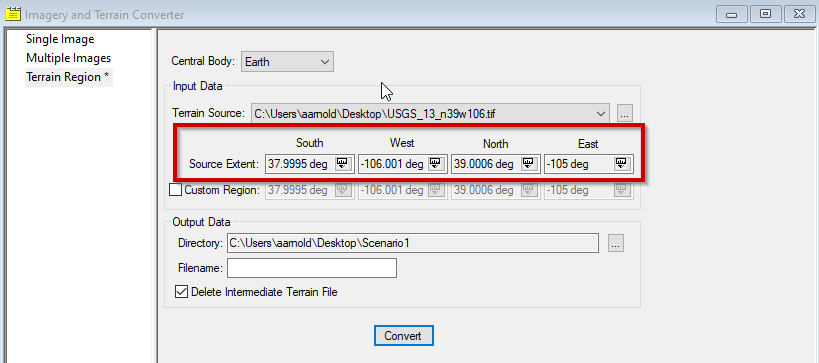
- In the Output Data field, select the ellipses button next to Directory, and select the STK scenario as the terrain directory.
- In the Output Data field, give the file a meaningful name (e.g., USGS_13_n39w106_2).
- Exit the filename field and verify that the filename gets a .pdtt extension (e.g., USGS_13_n39w106_2.pdtt). The extension should be added automatically.
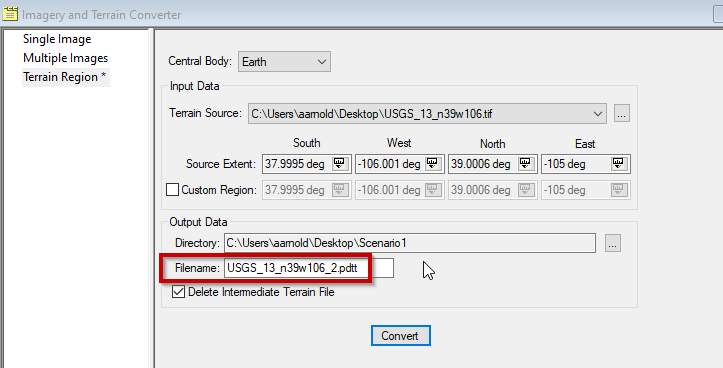
- Select Convert. Be patient, this step may take some time!
- Once the conversion is done, select Close to exit the Imagery and Terrain Converter window.
Visualize terrain using Globe Manager
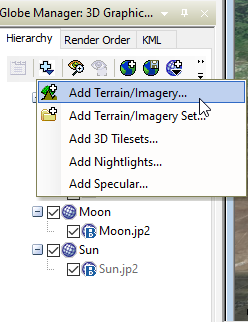
- On the 3D Graphics Window toolbar, select the Globe Manager icon.
- In the Globe Manager, select the Add Imagery/Terrain icon, then select Add Terrain/Imagery.
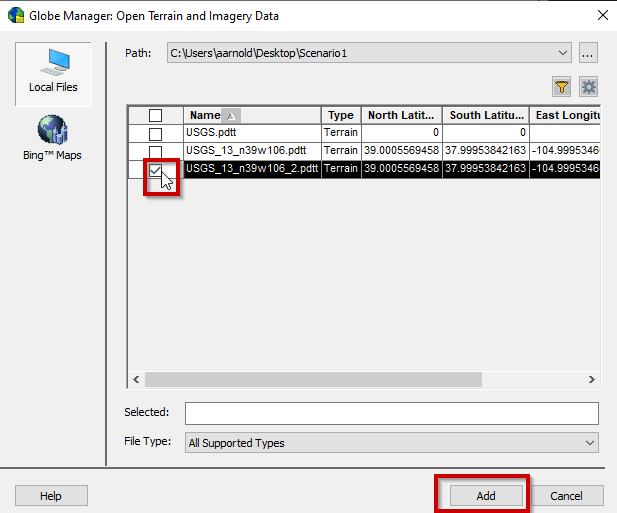
- Browse to your scenario path.
- Check the box next to your terrain .pdtt file, then select Add.
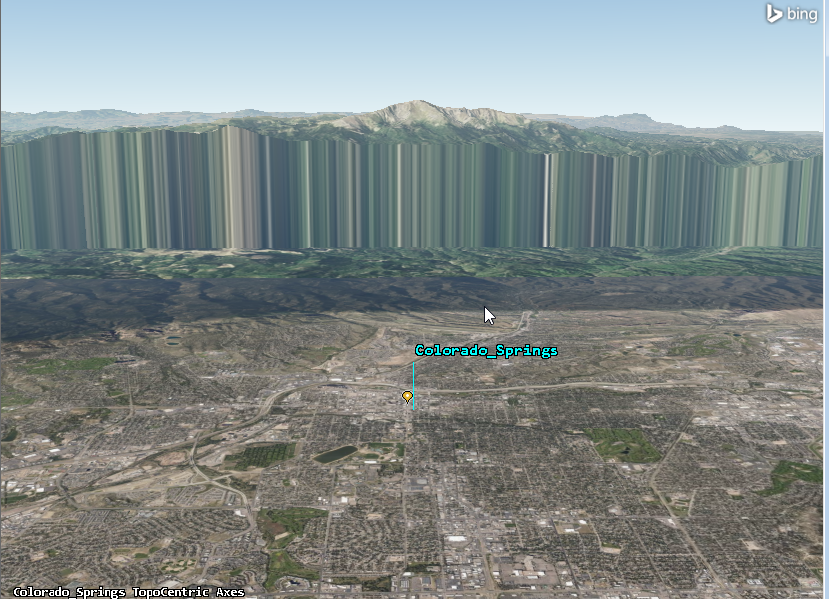
- Visualize your terrain in the 3D Graphics Window.